Tag Archives: baking

catching up (in photos)

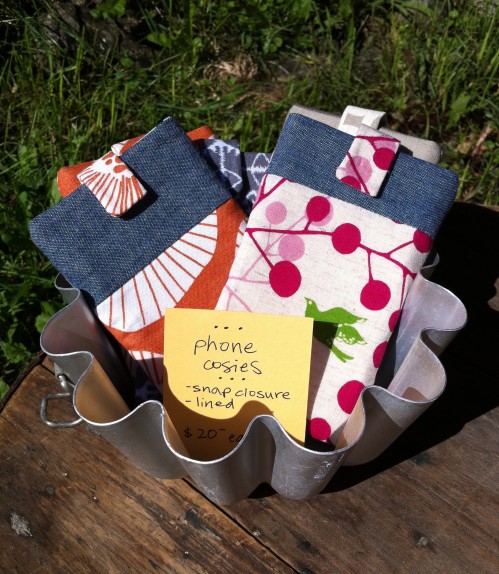
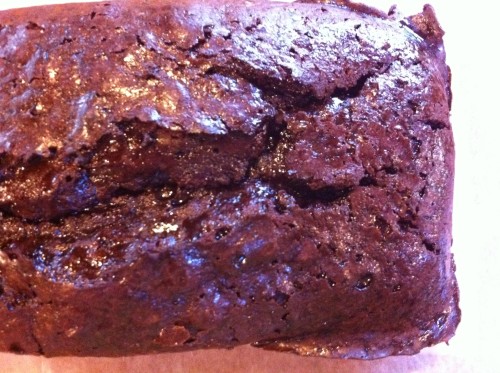
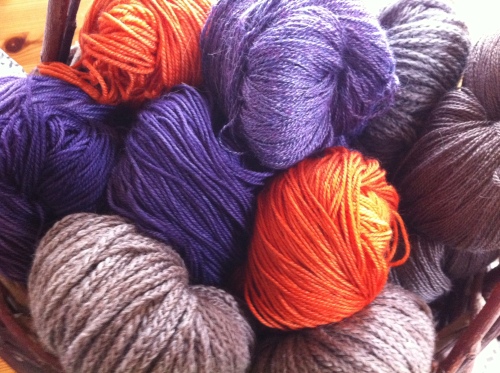
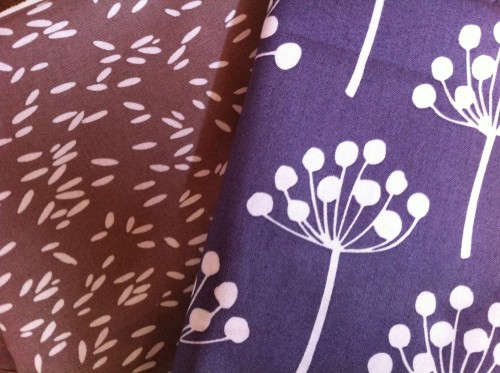
there has been a lot of undocumented stirring and stitching going on this summer.  here is a small taste of what the last couple of months have looked like…

all of that and a trip to killarney, many a hot run, working five days a week and some lovely chats with lovely people at the studio tour has made this a full and fulfilling summer.  i hope that you have had a marvy summer, too!

•  •  •

9 Comments

Filed under baking, sewing

old-school {rhubarb-strawberry double crisp}

i love rhubarb.  it is the only plant in my garden that thrives regardless of the degree of neglect it faces (which is significant).  my initial investment of a few dollars for the cutting and a few years of patient observation has finally yielded a boisterous looking plant that is established enough to support our seasonal need for rhubarb crisp.

there are so many lovely things one can do with rhubarb, but our favourite is an old-fashioned crisp with some strawberries mixed in to balance the tang.  it’s a simple enough dish – one that i’d like to be able to throw together without a recipe, but each year i learn the hard way that i really do need some help to get the topping just right.  i’ve made several different recipes so far this season, and i think i’ve found the ultimate (if you’re of the ‘you can never have too much crisp in a crisp’ persuasion).  with an ample golden buttery topping, a sweet and sour filling of just the right consistency, and a surprise layer of a deliciously thin oatmeal cookie-like crust beneath, this recipe from dorie greenspan is guaranteed to make crisp-lovers swoon.

now, before i share with you dorie’s recipe, i must say that in the kitchen, there are some things that simply can’t be improved upon and shouldn’t be meddled with.  the first time i made dorie’s strawberry-rhubarb double crisp, i followed her recipe obediently.  after all, who am i to question the wisdom of a baking goddess like dorie?  the thought of crystallized ginger studding the crust and ground ginger flavouring the fruit filling sounded amazing, but i have to say that i found all of that gingery zing a bit unpleasant and out-of-place (and i am a certified ginger-lover).  sorry, dorie.  the rest of the recipe, however, was perfect, so i tried it again this weekend, sans ginger, and i am much happier with the more traditional flavour.

this recipe is a little fiddly because you make what is essentially a strawberry jam to pour over the rhubarb before baking.  the beauty of this approach is that it guarantees a non-soggy crust and a non-soupy filling, but you kind of lose the texture of the berries.  in my next iteration of this recipe, i’d like to see what happens if i skip the cooking of the berries and just toss them together with the rhubarb and sugar, though that approach may be better suited to the truly old-school single layer crisp.  thankfully my neglected rhubarb plant continues to push up enough brilliantly red stalks of goodness to allow me a little more experimentation.

• • •

strawberry-rhubarb double crisp (from ‘baking, from my home to yours’, by dorie greenspan)

for the crisp:
1 cup all-purpose flour
1 cup packed light brown sugar
1/4 cup old-fashioned oats
1/2 tsp ground ginger (not for me)
pinch of salt
pinch of ground cinnamon (i increased this to 1/4 tsp)
1/2 cup finely chopped walnuts
1/4 cup finely chopped crystalized ginger (skip if going old-school)
1 stick (8 tbsp) unsalted butter, melted and cooled

for the filling:
1 pound (4-5 medium stalks) rhubarb, trimmed and peeled (i never peel my rhubarb. is that so bad?)
3 tbsp cornstarch
1/2 cup cold water
3 cups (about 12 ounces) strawberries, hulled and sliced (i can say that frozen berries work as well as fresh)
1 cup sugar (don’t skimp as i did the first time)
1/2 tsp ground ginger (skip if going old-school)
1 tsp pure vanilla extract

•dorie says to use a 9″ square non-reactive baking pan and place it on a lined baking sheet. i just used my oval 3 1/2 quart le creuset, which was deep enough to avoid any bubbling over. preheat oven to 350°f.
•put the flour, brown sugar, oats, salt and spices in a large bowl and sift the ingredients through your fingers to break up any lumps of brown sugar. mix in the nuts (and crystallized ginger, if using), then pour over the melted butter. stir the ingredients until they are thoroughly moistened. spoon half of the mixture into the pan and pat it down lightly to form a thick crust; set aside the remaining mixture for the topping (don’t eat too much of it!).
•slice the rhubarb into 1/2″ chunks and scatter them over the pressed-in base.
•dissolve the cornstarch in the cold water and set aside. put the berries, sugar and ginger (if using) into a medium saucepan and crush the berries with a fork or potato masher. place the pan over medium heat and, stirring occasionally, bring to a full boil. pour in the cornstarch mixture and, stirring, bring back to a boil. keep cooking and stirring until the berry filling is thick and no longer cloudy, about 3 minutes. remove from heat, stir in the vanilla, then pour the filling over the rhubarb.
•scatter the remaining topping evenly over the filling.
•bake for 60 minutes, or until the topping is golden and the strawberry jam is bubbling up all around the edges. cool on a rack and serve warm or at room temperature (with ice cream, of course).  this crisp is best served the day it is made, as the bottom layer of crisp becomes a little less crisp on days two and three (if it lasts that long).

•  •  •

8 Comments

Filed under baking

short, dark and handsome {chocolate loaf cake}

not every occasion calls for an iced layer cake (though i could be convinced otherwise without much effort at all).  there are times, of course, when a more modest treat is required – something plain and non-fussy, but equally delicious and satisfying.  when it is one of those times, this is what you should make.

i know, this slab of chocolate loaf may not have the allure of its more glamorous counterparts (really, who can compete with a frosted cupcake?), but rest assured, it more than makes up for its simple looks with its knock-out taste.  its flavour is deep and intense and chocolatey.  its texture manages to be both dense and light at the same time.  it is surprisingly moist and moreishly smooth, and on day three it is still swoon-worthy.  have i convinced you yet?

this recipe comes from one of my intellectual kitchen crushes, nigella lawson.  my copies of her books are dog-eared and spattered with regular use.  i’ve called upon her ‘chocolate cake hall of fame’ chapter (in ‘feast’) so frequently that the book naturally falls open to those pages, and this beauty, on page 272, has become one of my new favourites.  sure, this chocolate loaf cake may not be tall, but it is dark and handsome (and humble and classic and delicious).  what more could you want?

•  •  •

quadruple chocolate loaf cake ( from ‘feast’, by nigella lawson)

for the cake:
200g plain flour
1/2 tsp baking soda
50g cocoa
275g caster sugar (regular granulated sugar works fine here)
175g soft unsalted butter
2 eggs, room temperature
1 tbsp real vanilla extract
80mL sour cream
125mL boiling water
175g dark chocolate chips (or chopped chocolate)

for the syrup:
1 tsp cocoa
125mL water
100g caster sugar (again, i used granulated)
25g dark chocolate (this is shaved for the topping, which i didn’t use)

•preheat oven to 170°c (this is almost 350°f). line a 21cm x 11cm and 7.5cm deep loaf pan with tinfoil and brush/spray with oil (leave some edges of foil sticking out for removing cake from pan).
•put flour, baking soda, sugar, butter, eggs, vanilla and sour cream into food processor and blitz to form a smooth batter (you can also follow the usual routine and make it in a mixer or by hand). scrape down the sides, then pulse again while pouring in the boiling water. stir in the chocolate chips by hand.
•pour batter into prepared pan and bake for about 60 minutes (mine took about 70 min, but my oven is labile), until the loaf is risen, split somewhat down the middle and a cake-tester comes out mostly clean (“…don’t be alarmed at a bit of stickiness in evidence; rather, greet it”).
•not long before the cake is finished baking, put the syrup ingredients into a small saucepan and bring to a boil, then continue to boil (CAREFULLY) for 5-10 minutes, until the liquid is reduced to a slick syrup.
•when the cake is done, place it on a cooling rack and pierce it here and there with a cake tester, then pour the syrup overtop and allow the cake to cool completely (though this is amazing, if a bit delicate, when still slightly warm).
•when ready to serve, remove cake from the pan and shave over some of the dark chocolate (i skipped the shaved chocolate, though it does make the cake look even more glorious).

•  •  •

12 Comments

Filed under baking

{moira’s brownies}

when it comes to baking, i’m suspicious of the ornate.  i’ve always been compelled by apparently simple treats that lure you in with taste over presentation.  thus, my adoration of the old-school brownie.

i’ve been fickle with brownie recipes over the years, moving from moosewood to ina to nigella, temporarily satisfying my quest for brownie perfection.  since i found moira’s brownies, however, i’ve never strayed.  loyalty is easy when you find a recipe this good.

i first tasted moira’s brownies at a holiday fete several years ago, where they were served for dessert, still warm from the oven.  until then, i had been of the icing-free brownie camp, but had to admit that the smooth, dark icing on those brownies made them look terribly enticing.  and the taste?  it was love at first bite.  the top of the brownies was ever so slightly crisp beneath the cocoay icing and the brownie beneath was delectably fudgey and satisfying without being overly sweet.  per.  fec.  tion.  it turned out those beauties had been baked by the hosts’ daughter, moira, who was 9 or 10 at the time.  a negotiation for the recipe soon began.

moira is a clever girl and wise beyond her years.  she has the discerning palate of a well-traveled, open-minded…tween…and knows a good thing when she tastes it.  she had sought out this recipe from friends of theirs and made her first batch when she was just 8.  since she loves to bake, she suggested that her prized brownie recipe could be traded for an equally desirable recipe of mine.  i had brought some holiday baking along, so i suggested she might consider my humble scottish shortbread worthy of the transaction.  she agreed, selected a square and began her assessment.  thankfully, after a well acted dramatic savouring, she smiled and nodded and the deal was done.  phew.

i have since shared moira’s brownies, and her recipe, far and wide.  i’m always careful to explain where the recipe originated, as i think it’s part of the charm of these brownies.  after i tell the story, i also mention that the key to the come-hitherness of these brownies is to ice them while they’re hot.  i know, i know, icing hot brownies flies in the face of collective baking wisdom, but in this case, it’s an exception worth making.  trust me – i know my brownies.

•  •  •

moira’s brownies (though it traveled through many hands before it got to mine, this recipe is said to have originated in the calgary herald, circa the late 1900’s)

1 1/2 cups brown sugar (dark brown is preferable)
1/2 cup melted unsalted butter
2 eggs
1/4 cup cocoa (best quality)
1/2 tsp vanilla (real, of course)
1 cup all-purpose flour
3/4 cup chopped toasted nuts (optional – i still haven’t joined the nuts-in-brownies camp)

•preheat oven to 325°f and grease and line an 8″ or 9″ pan with parchment (i use an 8″ pan).
•mix the brown sugar and melted butter. stir in the eggs one at a time and mix well, then add the vanilla. sift the cocoa in to the mixture, followed by the flour and stir until combined. stir in the nuts, if using.
•spread in prepared pan and bake for 35-40 minutes. prepare the icing as you ice these when they come out of the oven.

1/3 cup unsalted butter, room temperature
1/3 cup cocoa
1 1/2 cups icing sugar
1 1/2 tsp vanilla
2 tbsp milk, more or less

•mix butter and cocoa until you have a smooth paste. stir in the icing sugar and vanilla, beating in the milk a little at a time until you have a nice consistency (remember, this will melt into the brownies, so thick is ok).
•gently spread icing atop the brownies when you take them out of the oven. leave to cool on a rack and try to wait until the icing is set before serving (but they’re quite delicious, if not as clean-cut looking, with molten icing running down the sides…)

•  •  •

•  •  •

12 Comments

Filed under baking

cow pie {chocolate chip cookies}

when i first started baking (decades ago.  decades.  ouch.), i couldn’t make a chocolate chip cookie that didn’t resemble a cow pie.  the cow pie isn’t a very appealing image, i know, but it very aptly described their appearance – wide, flat and bumpy.  looking back, i’m sure this propensity to spread had more to do with my technique than it did with the recipe.  too soft butter (i probably used margarine in those early days – shudder.), too hot an oven,  over beating the dough, using super-dark cookie sheets…all my own missteps.  i had always viewed my cow pie cookies as inferiors to their puffy, golden, cakey cousins, and have been disappointed with just about every single batch i’ve ever made, until last night.

TDHH knows all he has to do is utter the words “i wish we could have some cookies/cake/brownies tonight” and i’ll have my apron tied and ingredients out before he actually finishes his sentence.  i love baking that much.

so last night he requested chocolate chip cookies.   i had already started mentally perusing my recipes, wondering which would yield the least cowpieish cookies, when he clarified that he was hoping for thin, buttery chocolate chip cookies.  a sincere request for cow pies?  really?

i recalled a recipe which met this very description and used fridge-cold butter*, a specification which makes these ideal for a spontaneous treat.  i had scrawled it into my recipe book years ago, and if i recall correctly, it belongs to david lebovitz.  now, i don’t know if his recipe was meant to produce  cow pies, but it does for me, reliably, and i had always considered this a drawback until i came to my cookie senses last night.

these cookies are very thin and golden and studded with dark chocolate chips.  they are buttery and sugary and vanilla-y.  they are at once crispy and chewy.  what in the world is inferior about that?  these cookies are, in a word, sublime – sublime enough to have made me appreciate every bit of their cowpieness and to have been deemed worthy of a spot near the top of my imaginary cookie recipe podium.

*don’t be bothered by this.  it works.  really.

•  •  •

david lebovitz’s (cow pie) {chocolate chip cookies}  (i probably don’t need to restate this, but they’re from david lebovitz)
makes about 2 dozen

1/2 cup granulated sugar
1/2 cup packed light brown sugar
8 tbsp (1/2 cup) cold unsalted butter, cut into 1/2″ pieces
1 large egg
1 tsp pure vanilla extract
1/2 tsp baking soda
1  1/4 cups all-purpose flour
1/4 tsp salt
1  1/2 cups semi-sweet chocolate chips (i used a combination of bittersweet chips, fudge chips and semi-sweet chips)
1 cup walnuts or pecans, toasted and chopped (we weren’t in the mood for nuts)

•preheat oven to 300°f.  beat the sugars and cold butter until smooth (i used my stand mixer – this is one you couldn’t do by hand).  mix in egg and vanilla and baking soda (adding the baking soda like this seemed weird to me).
•stir flour and salt together, then stir into the butter mixture.  stir in the chocolate chips (and nuts, if using).
•scoop batter into 2 tbsp balls and place 4″ apart on cookie sheet (i wonder if they would have spread less if i didn’t use parchment?).  bake for 18 minutes (mine were done in 15).  cool somewhat before handling as they’re fragile when hot.  enjoy!

•  •  •

21 Comments

Filed under baking

creative fuel

i love a trip to the city.  i mean the city.  toronto.

once or twice a year i have a work-related stay in TO.  when i’m there, my mission is to cram in as much walking, gawking and general city-imbibing as possible.  the chaos and crowds are both exhilarating and exhausting, and i find, for a short time anyways, that i am strangely soothed by the rhythm of urban life.  it couldn’t be more different from our home in the countryside, where trees outnumber people exponentially and heavy traffic means actually having to stop at the stop sign before turning.

one of the benefits of city excursions, apart from the fashion lessons, teashops and people-watching, is the improved access to all things crafty and the ability to refuel for my creative pursuits.  this trip allowed me to expand my stirandstitch stashes quite nicely (and to soothe IDS, who can get a little testy when left in the countryside for too long).

{crochet-fuel}     the yarn related highlight of this trip was my first ever visit to romni wools  – the epic toronto yarn store.  i don’t use the word epic flippantly here.  romni’s monstrous, bursting, teeming and towering collection of fibers is daunting to even the most yarn-starved shopper.  it was utterly overwhelming, but i managed to find some lovely, squishy goodies to take home, including some bright malabrigo sock and some nifty ‘braided’ cascade.


{sewing-fuel}     i discovered the workroom online and was instantly smitten.  they have a fabulous selection of contemporary fabrics and high quality notions, a friendly shop dog and a great calendar of sewing classes.  the timing of my trip worked out perfectly for me to take their three hour ‘serger essentials’ course – instruction i’ve been needing for years.  i came home with some new-found serger confidence and a set of rolled-hem napkins which we made in class.  i couldn’t resist a couple of pieces of lotta jansdotter fabric and three marvy patterns (including one for a sweet colette blouse) that i can’t wait to dig into.

{baking-fuel}     i have a cookbook addiction.  i could read cookbooks all day.  really.  this obsession has necessitated a moratorium on cookbook purchases (i also have a moratorium on tea mugs and flip-flops).  i had to allow myself an exception in toronto, though, for dorie greenspan’s ‘baking – from my home to yours’.  it’s been around for a while now, so it seemed less impulsive and more appropriate to add it to my collection (and really, what baker’s library is complete without it?).  i’ve been eagerly flipping the pages, wondering which recipe will be the first into my mixer.

•  •  •

stirandstitch has refueled!  three days in toronto allowed me to absorb just enough urban sensibility to remain connected to city-life.  it also offered loads of tea, a little bit of chocolate and plenty of creative fuel for projects-to-be.  and it was just long enough, just windy enough and just lonely enough to make me (and even my testy IDS) feel happy to come home.

•  •  •

28 Comments

Filed under baking, crocheting, sewing

creme fraiche {blueberry scones}

i wish you could smell my house right now.  buttery, floury, sugary, warm – the emanations of scones in the oven.  such a heavenly and comforting scent.  it makes even our mid-renovation kitchen feel glowy and wholesome and good.

instead of being at work today, my cough/cold germs and i are at home, filling the hours with the kind of non-demanding, pleasure-filled tasks that are normally reserved for weekends and evenings (one of the blessings of being sick, i suppose).  my wrists needed a break from crocheting, so my thoughts turned to baking (as they so often do).  i didn’t want anything overly sweet.  or chocolatey.  or involved.  then i remembered i had a tub of creme fraiche in the fridge.

creme fraiche is one of the many culinary treasures i encountered (and immediately loved – along with cream tea, egg and cress sandwiches, bakewell tarts, eccles cakes, greengrocers and ribena) when i lived in the UK.  i’ve been stumbling over recipe after recipe calling for it lately.  sadly, but understandably, it is one of those elusive ingredients that just isn’t stocked in a rural grocery store.  when i discovered it gracing the dairy shelf of the nearest ‘big city grocery store’, i was thrilled…until i got home and couldn’t find even one of those oh so promising sounding recipes.  does this ever happen to you?  it’s a common theme for me.  wonton wrappers, walnut oil, asafoetida, harissa paste and, most recently, creme fraiche – they all held such allure at the time of purchase, until i got them home and couldn’t think of one single thing to do with them.

so this afternoon i decided it was necessary to find a use for this tub of creme fraiche and came across a recipe that wooed me right away – the aforementioned blueberry scones.  i love a good scone and loathe a bad one.  even lashings of butter can’t rescue a dry and flavourless puck of a scone.  despite temptation, i didn’t mix in any lemon zest for zing or adorn their tops with coarse sugar – i just dutifully followed the rather plain sounding recipe, and i’m glad i did.  i think the creme fraiche gives these a deeper and more unique flavour than your standard cream or milk enriched scone.  an IDS approved scone would be thicker and shaped more tidily (i have only myself to blame for the sloppiness), but there is something quaint and pleasing about these simple and flavourful little triangles – they are a perfectly lovely accompaniment to a spoonful of blueberry apple butter and a brit-worthy cuppa on a sniffly afternoon.  enjoy!

•  •  •

blueberry scones (posted by ‘howchow’ on chowhound, 2007)

2 cups  all-purpose flour
1/4 cup  sugar
2 tsp  baking powder
1/2 tsp  salt
blueberries (no measure was given – i used about 3/4 cup frozen wild blueberries – thawed)
6 tbsp  cold butter, cut into pieces
1 egg + 1 egg yolk
7.5 oz  creme fraiche
1 1/2 tsp  vanilla

•stir flour, sugar, baking powder and salt together. blend in butter until it resembles fine meal.  in a separate bowl whisk the egg + yolk, creme fraiche and vanilla together.  gently stir this and the blueberries into the flour mixture (i did the mixing of the butter into the flour and the wet into the dry in my stand mixer, much like when making pie crust).  the dough will be sticky and a little on the wet side.

•bring dough together on a well-floured surface (this is always a clean dish towel for me).  with floured hands, divide dough in half.  pat each half into a disc about 1/2″ thick/6″ in diameter (i would leave them a little thicker next time).  cut each disc into 6 pieces and place pieces 1″ apart on a cookie sheet (i always use parchment).  bake at 350°f for 25 minutes until golden and a toothpick inserted comes out clean (mine only needed 20 minutes).  serve warm or at room temperature.

22 Comments

Filed under baking, crocheting

the enigmatic ginger crunch

i think a great recipe is made even greater if it has a history of good memories behind it.  this is one of those recipes.

‘the enigmatic ginger crunch’ recipe came into my life when TDHH and i were exploring the maritimes this summer.  a spate of unseasonably cold and wet weather froze and saturated our usually more rugged selves and had us neglecting our tent in favour of a warm and dry b&b.  by the time we made it to lunenburg, nova scotia, we were beginning to lose hope in tourist accommodations.  we had come across too many sadly dated pastel colour schemes, surfaces covered with dead-eyed porcelain dolls and bowls of synthetic potpourri (IDS was not amused).  even TDHH, who has and will sleep anywhere, found the plethora of lace doilies and forced conversation with too-keen hosts eerily unpleasant.  then we found ‘1775 solomon house’ (one of the oldest historic homes in lunenburg) which was, by vast leaps and bounds, the most brilliant b&b we’ve ever experienced.  authentic, antique, welcoming and instantly comfortable.  the host, janet, artfully curated our time in lunenburg, ensuring we found the hidden beaches and out-of-the-way bakeries.  it turns out janet knows her way around the kitchen, too.


when we arrived late in the evening, we  found a dainty dish of these mysteriously delicious bites of glory awaiting us.  they didn’t look terribly exciting, but after one bite, i had to have the recipe.

thankfully, janet was willing to share.  i learned that janet is a former cafe-owner/chef from saskatchewan, who received the recipe by way of a new zealander customer of hers who traded it for a recipe of janet’s which she coveted.  going back a little further, i’ve read that the recipe originated many years ago in scotland and made its way to new zealand with what must have been a very discerning, food-loving scot.  such a convoluted path!

so now for the enigma explanation.  when i first tasted these, i was sure that they involved browned-butter.  others have queried cardamom or lavender.  no one who has tried them (in my presence, anyway) has correctly identified the flavour.  it turns out it comes simply from powdered ginger, butter and a splash of vanilla.

like most of the recipes i return to again and again, these ingredients create a fabulous flavour that belies their simple origin.  the combination of the thin ginger shortbread base and the smooth, subtly gingery fudge topping is a knock-out.  people have literally swooned when tasting them, and i daresay you will, too.  you may even taste the maritime architecture and the atlantic air.

• • •

ginger crunch, aka kiwi crunch (i found the same recipe in gourmet, december 1999)

for the base:
1 1/4 cups all-purpose flour
3 tbsp granulated sugar
1 tsp baking powder
1 tsp ground ginger
1/4 tsp salt
1 stick (1/2 cup) cold unsalted butter, cut into 8 or so pieces

for the topping:
3/4 stick (6 tbsp) unsalted butter
1 tbsp lyle’s golden syrup (corn syrup will do in a pinch)
1 cup icing sugar
1/2 tsp ground ginger
1/2 tsp vanilla

•sift the base ingredients together (i just whisk them) and blend in
the butter until it resembles coarse meal (i use my stand mixer). press evenly into a greased and parchment-lined 9×13″ metal pan (i learned that part the hard way – definitely line your pan). bake at 350°f for 15-25 minutes until golden and crisp (i know that’s a wide range in terms of time – what it means is don’t take your eyes off of it after the 15 minute mark – it browns quickly).

•just before the base is done (about 5 minutes if you can time it), melt the topping butter in a heavy pot, then whisk in the remaining ingredients until smooth. bring to a boil, then simmer, stirring, for about 30 seconds. remove the golden base from the oven and pour the topping over-top, tilting the pan to cover evenly. cool in the pan on a rack and cut into small squares or rectangles while cooling (for me, i wait 5-6 minutes so they’re cool enough that the topping is starting to set but not so cool that they crack). cool completely in pan.

yields about 2-5 dozen, depending on size cut.  squares keep at least 3 days in an airtight container.

11 Comments

Filed under baking

don’t fear the crust – how to make a perfect {sour cherry amaretto} pie

TDHH has been dropping frequent and increasingly less subtle hints lately that he would like a cherry pie.  his request is due in part to the fact that we’ve been re-watching ‘twin peaks’.  episode after episode, we are subjected to special agent dale cooper’s adoration and enjoyment of slice after slice of gorgeous cherry pie (yum to both the pie and special agent cooper).

so today i am straying (again) from my original pledge to share gift-able items, but i think i can get off on a technicality by stretching the definition a little bit to include home-made things that people like to receive.  and home-made pie is surely one of those things.  my IDS* feels there is no excuse for buying pie crust and pie filling, and i tend to agree, not because i’m a snob, but because i get so much pleasure out of baking a pie that i cannot bring myself to buy one.  sure, baking from scratch takes longer, but the effort more than pays for itself in taste and appearance.

a good pie is something of an enigma.  it is so simple in its components – there is nothing new-fangled or high-tech about it, but a good pie evades many a baker, and it is the crust that is most often the culprit.  crust intimidates and causes many a capable baker to defer to frozen pie shells.  because TDHH has always been more of a pie man than a cake and cookies man, i’ve had many opportunities to hone my pastry making skills over the years.  there is an art and science  to pastry making to be sure (you can read more about the science part here), and while i have no illusions of being a master pastry chef or food scientist, i’d like to offer my tried and true tips for creating a knock-your-socks-off, home-made work of art.

here is what i’ve learned (the hard way):

1.  use butter.  yes, using shortening will yield the flakiest crust imaginable, but i prefer the flavour of an all-butter crust.  executed correctly, an all-butter crust will be beautifully flaky and tender, lovely and golden, and more delicious than anything made with hydrogenated oils.

2.  cold is key.  butter must be fridge-cold and firm, never ever soft or room-temperature.  your liquid, whether water, milk or buttermilk, must be icy.  that said, i don’t bother with ice-cubes – fridge-cold or tap-cold will do (but let it get as cold as can be).

3.  hands off!  my pastry improved dramatically when i stopped using pastry cutters and hands and started using my stand-mixer.  despite the fact that my hands are usually cold, i would inevitably warm the butter and over-mix everything, yielding a gummy, glutinous gaffe of a crust.  but in my mixer, it’s magic.  mix with the paddle until the butter is mostly incorporated and some small shards remain.  it works equally as well in a food processor, in fact it’s faster, but i have a soft spot for my mighty mixer and prefer it over the food pro for pastry.

4.  for the love of betty crocker, don’t over-mix.  while the mixer is stirring, add the frigid liquid in a slow but steady stream and stop pouring as soon as everything starts to come together.  you may need more or less liquid depending or your altitude (it’s true!).   you want the dough cohesive enough that most of it is clinging to the paddle – think chunks of play-doh.  pull it all together gently with your hands and form it into a disc, resisting the urge to knead, mash or otherwise overwork the dough (you will make two discs if it’s a double crust affair).

5.  chill some more.  wrap your disc in cling-film and chill before you roll it out.  i find 15 or 20 minutes in the fridge is plenty – any longer and the dough becomes too stiff to work with.  likewise, keep the prepared crust in the fridge until it’s ready to be filled and baked.

6.  skip the floured counter.  my mother-in-law rolls her pastry on a clean dish towel.  imagine!  it works like a charm.  no more sticky counters or PITA pastry mats to wash.  use a clean kitchen towel, sprinkle with flour, and roll away.  roll only north-south/east-west and out from the center – does that make sense?  it’s easier to make it round that way.  pick up and turn the dough as you’re rolling – it prevents sticking and you won’t need as much flour.  a french rolling-pin makes the rolling a little easier, but as you can see, it’s not a deal-breaker.

7.  use a glass pie plate.  seriously.  in my baking dark ages, i used those ‘non-stick’ metal pie tins.  too dark.  too inconsistent.  too non-see through.  switching to pyrex has meant no more underbaked crusts.  being able to see the bottom and assess the done-ness is, for me, essential.  and so far i haven’t dropped a hot pie on my face while cautiously holding it above my head to check the bottom.

8.  may i make one more stipulation?  the filling must be home-made.  yes, it’s slightly more time-consuming, but there is something soothing and satisfying about stirring fruit and sugar in a big bowl and tipping it into a waiting pastry shell.

so fear not the home-made pie!  it is so much easier than it looks.  below is my go-to recipe for sour cherry pie.  it is an amalgamation of recipes and experience – guaranteed to satisfy any IDS and special agent that you may encounter (and it is heartily endorsed by TDHH).

*inner domestic snob (introduced here).

•   •   •

sour cherry pie (crust adapted from mark bittman, filling adapted from rebar)
for pastry (makes a double crust):
2 1/4 cups  all-purpose flour
1 tsp  salt (i use about 3/4 tsp)
2 tsp  sugar (i use vanilla sugar – sugar stored with used vanilla beans – mmm)
1 cup  cold unsalted butter, cut into small pieces
6 tbsp ice-cold water (you may need more or less)
•combine flour, salt and sugar in stand mixer (he uses a food processor).  add the butter and stir with mixer until blended  and the mixture resembles cornmeal with some small lumps of butter.
with the mixer stirring, drizzle in the water and stop pouring when the dough starts to form around the paddle.  remove to some cling-film, gather together into 2 equal discs, wrap in the cling and chill for 15 – 30 minutes.
•when ready to fill, roll out one disc to 1/4″ thickness on a clean, floured dish towel.  transfer to glass pie plate by draping the dough over your rolling-pin.  store in fridge while preparing lattice top.  roll out second disc as above and cut into strips.  place strips across top of filled pie, weaving as you go.
for cherry amaretto filling:
2 x 796mL jars  pitted sour cherries (double-check that all pits were removed by rolling between fingertips)
1/2 cup  granulated sugar
1/4 cup  cornstarch
1 tbsp  amaretto (optional, but so good)
1/2-1 tsp  pure almond extract
1 tbsp milk
1-2 tbsp   turbinado sugar for topping
•combine all ingredients except milk and turbinado in a large bowl, making sure there are no lumps of cornstarch.  pour into chilled pie crust, top with lattice, brush with milk and sprinkle with the turbinado sugar.
bake at 450°f for 10 minutes, then decrease to 350°f and bake for another 40-50 minutes (mine usually needs longer), until filling is bubbly and thickened and bottom crust appears golden.  cool on a rack and serve warm or at room temperature.

12 Comments

Filed under baking

the necessity of {spoon cookies}

junior spoon cookies (not yet sandwiched)

when it comes to the holidays, my inner domestic-snob (IDS) takes over my usually placid and muchmore reasonable self.  she recoils at the sight of plastic decorations and battery-operated toys.  she silently cringes in the company of store-bought pies and cookies that never expire, and part of her soul weeps at the popularity of hastily    stuffed gift bags over properly wrapped packages.  now, before i offend everyone who has ever given a gift in a bag or bought a pie (myself included), i must explain that i exist on both sides of this pretentious fence.  i’ve been known to devour tubs of icing and store-bought cake mix, and i readily admit to gifting a hotwheels set to our 5-year-old nephew (i don’t think a crocheted scarf would have garnered the same squeal of delight).  i admire the best ingredients and the finest products, but a militant martha stewart clone i am not.  neither am i oblivious to reality – life is hectic and the pressure to please is immense.  i love all sincere gifts, regardless of their wrappage or what’s inside, and i truly appreciate the effort put into meals and treats, whether they come out of a freezer section or a cookbook.  while i acknowledge that my IDS is, well, a snob, i do appreciate her pesky voice reminding me to try a little harder.  sure, my efforts generally fall somewhere between perfection and reality (usually a little closer to the latter), but this middle ground is good enough for me.

thus, my plan is to share with you some of my favourite handmade items of joy.  most are edible (the stir part) or wearable/usable (the stitch part), and all are giftable (and IDS-approved).  i hope you enjoy!

•••

i shall begin with spoon cookies.  to me, these are the ultimate gift cookie.  i’ve been making these every christmas since i came across the recipe in the december 2005 issue of gourmet (RIP).  they are pain-staking.  they are fussy.  they are demanding of your time and patience.  but when you taste them, they…are…divine.  mysterious.  unique.  and so more-ish.  make them now!!

spoon cookies (from gourmet, adapted from celia barbour)

2 sticks (1 cup) cold unsalted butter, cut into pieces

3/4 cup sugar

2 tsp vanilla (pure, of course)

2 cups all-purpose flour (unbleached preferred)

1 tsp baking soda

1/8 tsp salt, slightly rounded

1/3 cup fruit preserves (strawberry and raspberry are lovely, don’t worry about seeds as it’s strained later)

prepare dough:  fill your sink with about 2″ of cold water and get out a heat-proof bowl.  prepare brown butter by melting butter in a 2-3 quart heavy saucepan over medium heat and cook, stirring occasionally.  the butter will foam, then dissipate and foam again just as it’s starting to brown nicely.  you want the butter to be golden with a nutty fragrance and the flecks on the bottom of the pan should be a rich caramel brown.  expect this to take about 10-12 minutes (and don’t turn your back).  place the pan in the sink of cold water to stop cooking, then cool, stirring frequently, until butter begins to look opaque, about 4 minutes (this is where i use a heat-proof bowl instead of putting my hot copper-bottomed pot into cold water).  remove bowl from sink and stir in sugar and vanilla.  whisk together flour, baking soda and salt in a small bowl and stir into butter mixture until a dough forms (it will initially look really sandy, just keep stirring).  shape dough into a ball, wrap in cling-film and stand at room temp (or fridge) for  1-2 hours (i think they taste even better if you chill dough overnight – just let the dough come to room temperature before trying to work with it).

form and bake cookies:  put rack in middle position and preheat oven to 325.  press a piece of dough into the bowl of a shallowish teaspoon, flatten top, then gently slide out and place on cookie sheet (lined with parchment).  the dough will be crumbly, but becomes cohesive when pressed.  form a sheet’s worth and bake for 8-15 minutes (7-8 minutes for me, but my oven is bizarre).  cool on sheet on a rack for 5 minutes, then transfer cookies to rack to cool completely (at least 30 minutes).

assemble cookies:  heat preserves in small saucepan over low heat until just runny, then pour through a fine sieve into a small bowl, pressing hard on solids, and cool completely (also run the spoon along the underside of the sieve, i find a lot of it sticks there).  spread the flat side of a cookie (duh) with a thin layer of preserves and sandwich with another cookie to form a wee egg-shaped beauty.  let sandwiched cookies set for 45 minutes, then store airtight for up to 2 weeks.  recipe makes about 30 sandwich cookies.

**note**:  the flavour of these cookies evolves – try to wait at least 2 days before eating.

13 Comments

Filed under baking