Monthly Archives: May 2012

how to {pincushion ring}

the pincushion ring is such a splendid idea, no?  as soon as i saw instructions for it in a post i was reading, i thought “yes, brilliant, must make one stat”.  that was two months ago, and, while i recall the instructions for the project itself, i cannot, for the life of me, recall the name of the blogger who wrote the tutorial.  what a jerk i am (IDS is tsking me AND waving her pointed finger).  i promise, if i ever manage to shake the memory loose from my dusty brain, i shall give credit where credit is due.

with my mea culpas out of the way, i feel i can, in good stead, get on with the details of this project.  the pincushion ring is one of those ridiculously simple creations that makes a small aspect of life so much easier.  when sewing, i feel like i spend a lot of time reaching back and forth from pincushion to project or from project to pincushion.  this little ring promises to save some of that reaching, keeping my pins (and their perch) so much closer to hand.  and, isn’t it darling?  it looks so sweet that i kind of want to eat it.  and make another batch.

supplies:
button (mine is about 1 1/8″ diameter)
fabric scrap (i cut mine 3 1/2″ diameter)
thin elastic
glue gun
scissors
marking pen
hand-sewing needle
thread

step 1: prepare the ring.  cut a 3″ piece of elastic and thread both ends up through the bottom of your button.  you will be tying them in a knot, but before you do, make sure to try it on so you know how big you want the ring to be (this is tricky to do – i held it in place with my left hand while it was on my left pointer finger and marked the top of each end of elastic so i knew roughly where the knot should end up).  tie a reef knot (remember girl guides?  right over left and through, left over right and through) and check the fit – adjust if needed – and trim off the extra elastic ends.

step 2: prepare the fabric.  cut your fabric in a circle at least 2″ wider in diameter than your ring.  i used a glass to draw the circle.  thread your needle and sew a basic running stitch around the outer edge of the circle, leaving about 1/4″ between your stitches and the outer edge.  cut your thread but leave a good 6″ tail to work with.  get a wad of your batting and ball it up in the middle of your fabric.  holding it in place with a fingertip, gently pull the tail of your thread until you have ensconced the batting with your fabric.  holding tight, stitch from side to side several times to close the hole, then knot your thread and cut.  admire your little dumpling!

step 3: join the two pieces.  heat up your glue gun.  apply a generous amount of hot glue to the knot and all around the top of the button – wherever it will have contact with the fabric cushion.  quickly apply the fabric dumpling (bottom of dumpling to the glue), press firmly and hold until set.  c’est fini!

•  •  •

14 Comments

Filed under sewing

short, dark and handsome {chocolate loaf cake}

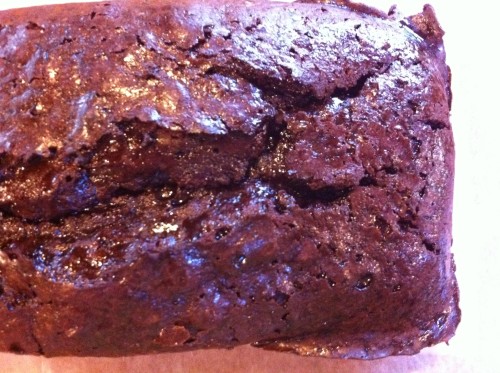
not every occasion calls for an iced layer cake (though i could be convinced otherwise without much effort at all).  there are times, of course, when a more modest treat is required – something plain and non-fussy, but equally delicious and satisfying.  when it is one of those times, this is what you should make.

i know, this slab of chocolate loaf may not have the allure of its more glamorous counterparts (really, who can compete with a frosted cupcake?), but rest assured, it more than makes up for its simple looks with its knock-out taste.  its flavour is deep and intense and chocolatey.  its texture manages to be both dense and light at the same time.  it is surprisingly moist and moreishly smooth, and on day three it is still swoon-worthy.  have i convinced you yet?

this recipe comes from one of my intellectual kitchen crushes, nigella lawson.  my copies of her books are dog-eared and spattered with regular use.  i’ve called upon her ‘chocolate cake hall of fame’ chapter (in ‘feast’) so frequently that the book naturally falls open to those pages, and this beauty, on page 272, has become one of my new favourites.  sure, this chocolate loaf cake may not be tall, but it is dark and handsome (and humble and classic and delicious).  what more could you want?

•  •  •

quadruple chocolate loaf cake ( from ‘feast’, by nigella lawson)

for the cake:
200g plain flour
1/2 tsp baking soda
50g cocoa
275g caster sugar (regular granulated sugar works fine here)
175g soft unsalted butter
2 eggs, room temperature
1 tbsp real vanilla extract
80mL sour cream
125mL boiling water
175g dark chocolate chips (or chopped chocolate)

for the syrup:
1 tsp cocoa
125mL water
100g caster sugar (again, i used granulated)
25g dark chocolate (this is shaved for the topping, which i didn’t use)

•preheat oven to 170°c (this is almost 350°f). line a 21cm x 11cm and 7.5cm deep loaf pan with tinfoil and brush/spray with oil (leave some edges of foil sticking out for removing cake from pan).
•put flour, baking soda, sugar, butter, eggs, vanilla and sour cream into food processor and blitz to form a smooth batter (you can also follow the usual routine and make it in a mixer or by hand). scrape down the sides, then pulse again while pouring in the boiling water. stir in the chocolate chips by hand.
•pour batter into prepared pan and bake for about 60 minutes (mine took about 70 min, but my oven is labile), until the loaf is risen, split somewhat down the middle and a cake-tester comes out mostly clean (“…don’t be alarmed at a bit of stickiness in evidence; rather, greet it”).
•not long before the cake is finished baking, put the syrup ingredients into a small saucepan and bring to a boil, then continue to boil (CAREFULLY) for 5-10 minutes, until the liquid is reduced to a slick syrup.
•when the cake is done, place it on a cooling rack and pierce it here and there with a cake tester, then pour the syrup overtop and allow the cake to cool completely (though this is amazing, if a bit delicate, when still slightly warm).
•when ready to serve, remove cake from the pan and shave over some of the dark chocolate (i skipped the shaved chocolate, though it does make the cake look even more glorious).

•  •  •

12 Comments

Filed under baking

sewing kindergarten {schoolhouse tunic}

i find the big world of garment sewing downright intimidating.  you see, as i’ve said previously, when it comes to sewing, i’m great at following instructions, but not so great at ad-libbing.  i really admire folks who can alter a pattern to fit their figure and style, and i seriously envy those who can forego the guidance of patterns altogether and make their own.  respect, mad-sewists!  if a lack of experience is at the root of my sewing inferiority complex, the solution must be to broaden my sewing horizons, no?

i’d had my eye on the schoolhouse tunic pattern for a while (it’s by meg mcelwee, a bona-fide member of the league of mad-sewists.  she’s way too talented).  her tunic pattern is both sweet and modern, with just enough forgiveness in the fit to make it a non-intimidating sew.  i made my first tunic in a baby-soft and surprisingly lightweight corduroy by amy butler.  i absolutely adore the slightly exotic feel of the floral pattern.  it lent itself very well to this simple, comfy project, and i was quite chuffed with the results.  i did find it a little too maternity-wearish initially, what with the double-whammy of front and back reverse box pleats, which look really sweet but aren’t terribly figure flattering, so i sewed down the back pleat which helped to minimize the poufiness of the rump area.

for my second schoolhouse tunic, i went a little more summery and used a slightly graphic, slightly romantic cotton from ty pennington.  yes, that ty pennington.  despite his overly caricatured personality, the dude has good taste in fabric design.  because the sewn-down back pleat in tunic number one was still a little bulky, i decided i needed to delete the back pleat entirely.  though it was the babiest of baby-steps, nixing the pleat did involve a tiny alteration of the pattern (what a brave girl!), and i’m pleased to report that it turned out perfectly.  not only am i much happier with the fit and the silhouette, but i’m quite impressed with my not entirely deliberate fabric matching at the back seam – it’s almost spot on.  silly detail, i know, but it’s progress.  i may not be ready for the league of mad-sewists yet, but i’m happily on my way.

•  •  •

42 Comments

Filed under sewing